Introduction
Getting good shots of rolling vineyards during a farm stay isn’t really about expensive gear. It’s more about knowing where to stand and when to press the shutter. These farm stay photography tips will help you capture postcard-worthy vineyard vistas using just about any camera—even a smartphone.
One thing I’ve come to appreciate: a working farm stay is fundamentally different from a countryside hotel. The smell of hay in the morning is part of the deal.
After working through this myself, I found a few things that textbooks don’t tell you.
Related: When to Visit Italy for the Best Agriturismo Experience | Choosing the Right Region: Where to Stay for Your First Visit | What is an Agriturismo? Italy’s Unique Farm-Stay Explained
The problem most travelers run into is ending up with flat, forgettable photos. You stand at the edge of a vineyard, snap a picture from eye level, and it looks like every other vineyard photo online. The secret to better images is changing your angle. A few degrees lower, a step to the side, or a higher viewpoint transforms a boring snapshot into a shot that makes you want to go back.
This guide focuses on practical angles and composition moves that work in real vineyards. No artistic theory. Just what to do, why it works, and when to use it.

Why the Right Angle Transforms a Vineyard Photo
Angle is the single most powerful tool you have. A generic shot from standing eye level shows a flat row of vines and a sky that takes up half the frame. It feels lifeless. Change your angle, and suddenly the photo gains depth, movement, and a sense of place.
Here’s what the right angle does for you:
- Creates depth: A low angle emphasizes the rows leading into the distance. The vines become a natural pathway for the eye.
- Highlights texture: Side angles capture the way light hits leaf surfaces and soil, giving the image a tactile feel.
- Adds context: A higher angle shows the layout—how terraces curve with the land, where the farmhouse sits, and how the vineyard stretches toward the horizon.
- Guides composition: Angling your shot to include a path, a fence, or a lone tree creates a natural focal point.
The quickest way to improve results is to get lower. It changes the relationship between the foreground vines, the middle ground, and the distant hills. You don’t need a fancy lens. You just need to move your body and be intentional about where you point the camera.
I’ve used both approaches extensively, and honestly, it depends entirely on what you’re trying to accomplish.
The Golden Hour Rule: Timing Your Angles for Best Light
Light is the second most important factor after angle. The direction of light determines which angles work best. You can’t change the sun, but you can adapt your angle to it.
Morning and late afternoon—commonly called golden hour—are your windows. Here’s how that breaks down by season:
- Summer: Golden hour is roughly 6:30–8:30 AM and 6:30–8:30 PM (adjust for your latitude).
- Spring/Fall: Shift earlier—7:00–9:00 AM and 5:00–7:00 PM.
- Winter: Narrow window—8:00–9:30 AM and 4:00–5:00 PM.
Why does this matter for your angles? Because of how the light interacts with the vineyard. During golden hour, light comes from a low angle. This creates:
- Side lighting: Best for texture. The light skims across the vine rows and soil, bringing out every wrinkle and vein.
- Backlighting: Good for silhouettes—a lone tree or farmhouse against a glowing sky.
- Front lighting: Makes colors pop, especially when the vineyard is in full green leaf or autumn color.
Cloud cover is your friend. When the sky is overcast, light becomes soft and diffused. Harsh shadows disappear, making it easier to shoot at any time of day. That’s when you can take advantage of angles that would normally be blown out in direct sunlight. Check the weather the night before, set your alarm, and scout your spots early.
Low Angle Shots: Emphasizing Vine Rows and Sky
The low angle shot does two things at once: it makes vine rows look like they stretch forever and brings the sky into the frame as a dramatic backdrop.
How to do it:
- Get down close to the ground, near the base of the first vine in a row.
- Point the camera up slightly so the row lines converge toward a vanishing point.
- Make sure the horizon line is low—about a third of the way from the bottom of the frame.
Gear helps, but isn’t required. A compact tripod or a flexible gorillapod lets you stabilize the camera at ground level without lying in the dirt. Travelers who want to keep their gear steady for these low shots might find a flexible tripod useful for wrapping around posts or branches. If you’re using a smartphone, flip the screen up and use the self-timer to avoid the shake from tapping the shutter.
Watch for lens flare. When you shoot this low and toward the sky, the sun can streak straight into the lens. Shield it with your hand or wait until the sun is just behind a cloud. The result is a shot that feels expansive, almost cinematic, without any fancy equipment.

High Angle Views: Capturing the Layout from Hilltops and Terraces
Vineyards are often built on slopes, which makes for natural elevated viewpoints. Hilltops, terraces, or even the upper floor of your farm stay can yield shots that show the full layout. High angles work best when you want to reveal patterns—spiral terraces, straight rows, or patchwork fields.
When shooting from high up:
- Go wide: A wide-angle focal length (24mm–35mm on a full-frame camera, or the widest setting on a smartphone) captures the surrounding landscape and puts the vineyard in context.
- Use telephoto: Zoom in on a specific section to compress the rows into tight lines. Telephoto compression makes the vines look closer together, creating a dense, textured pattern.
- Frame with natural edges: Use a tree branch, a building corner, or a window frame to anchor the shot. It adds a sense of place and stops the photo from feeling like a generic aerial view.
Scout these spots during check-in. Walk around the farm stay and identify the highest accessible points. A terrace overlooking the valley, a hilltop just beyond the property line (ask permission), or even a bedroom window with a clear view. Use a remote shutter or the camera’s timer to avoid blur from pressing the shutter button.
Leading Lines: Using Vine Rows, Paths, and Fences
Leading lines are a simple composition trick that works in almost every vineyard. The idea is to position a line—like a row of vines, a gravel path, or a wooden fence—so it guides the viewer’s eye into the frame toward a focal point.
Examples that work:
- Vine rows: Stand at the start of the row, about knee height. The parallel lines converge toward a farmhouse, a hill, or the sun.
- Paths: A dirt path curving between rows leads the eye naturally. Place the path starting from a corner or the bottom edge.
- Fences: A wooden or metal fence that follows the vineyard edge gives a sense of boundary and scale.
The key is positioning yourself so the line enters from a corner or one side of the frame, then angles toward the center. Avoid placing the line straight across the middle—it splits the photo and kills the flow. This technique works with any camera. Your smartphone can handle it just fine, as long as you don’t use the ultra-wide distortion that bends straight lines. If your phone has a ‘standard’ or ‘telephoto’ lens, switch to it.
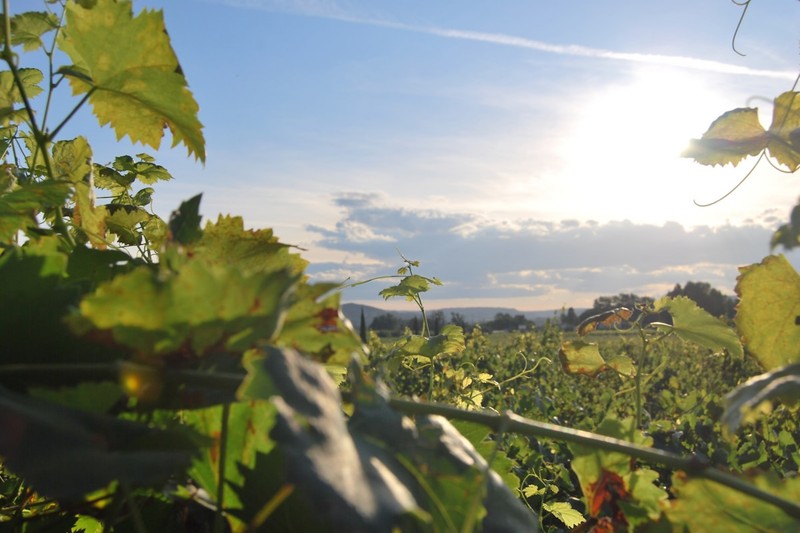
Framing with Foreground Elements: Leaves, Posts, and Arches
Foreground framing adds instant depth. You take something close—a vine leaf, a trellis post, an archway—and let it create a natural border around the distant view. It gives the photo a layered look that feels intentional and observant.
Foreground elements that work in a vineyard:
- Overhanging vine leaves: Let some leaves peek into the top corner of the frame. They don’t need to be in sharp focus—blurred is fine.
- Trellis posts: Position a wooden post at the left or right edge to balance the composition.
- Arches: A stone arch entrance to the vineyard creates a natural window. Frame the shot so the arch forms a roughly symmetrical frame around the vines beyond.
Be careful not to clutter the foreground. One or two elements are enough. More than that, and the viewer struggles to find the subject. A polarized filter helps here. It cuts down on leaf glare from reflected sunlight, keeping the foreground clean and the colors richer. For smartphone shooters, a clip-on polarizer for phone cameras can be a simple way to improve color saturation and reduce reflections.
Close-Ups and Details: Texture of Vines, Grapes, and Soil
Not every great farm stay photo needs to be a sweeping vista. Close-ups add narrative variety—they show the texture and life of the vineyard up close. These shots are easy to take, even with just a smartphone. Most modern phones have a macro mode that can get you within a couple of inches.
What to focus on:
- Grape clusters: Shoot from the side to show the individual berries. Backlight makes them look translucent and vibrant.
- Leaf veins: Get close enough to see the veins running through a large leaf. Side lighting brings out the detail.
- Bark and vines: The gnarly, twisted trunks of old vines tell a story. A close-up from a low angle emphasizes age.
- Soil: The earth between rows—especially after rain or when it’s been freshly tilled—adds context and weight.
Close-ups do more than fill your gallery. They pair well with wide-angle shots when you’re putting together a travel report or a blog post. The mix of broad landscapes and intimate details makes the story feel more complete.
Common Angle Mistakes That Ruin Vineyard Photos
Even with good intentions, several mistakes come up repeatedly. Here are the most common ones, with straightforward fixes.
Mistake 1: Shooting from eye level only.
The view from standing is what every tourist captures. It’s convenient but boring. Fix: Get low or find a height advantage. Kneel, sit, or climb a small rise.
Mistake 2: Overusing wide angles.
Wide lenses distort lines—vine rows that should be straight end up bowing outward. Fix: Use a moderate wide-angle or standard focal length. In smartphones, avoid the ultra-wide mode unless you’re trying to exaggerate perspective for effect.
Mistake 3: Ignoring the horizon line.
Crooked horizons are the most common editing fix people need. It’s also easily avoidable. Fix: Use the grid overlay on your camera or phone. Align the horizon with one of the grid lines. If your camera has a built-in level, turn it on.
Mistake 4: Not moving around.
Some people stand in one spot and take five nearly identical photos. Fix: Walk the length of several rows. Find different angles—shoot from the start of a row, the middle, and the end. Each position gives a different perspective.
Correcting these mistakes is a matter of habit. Once you scan your viewfinder and check for these pitfalls, your photos will immediately start looking better.
What to Photograph: Morning Dew, Evening Shadows, and Harvest Activities
Planning around specific moments in the day gives you a better chance of getting interesting images. Here are three types of shots that stand out.
Morning dew on grapes: Low angle, early morning. The water droplets catch the light and make the grapes look almost polished. Use a macro or close-up lens for the tightest view. A macro lens for smartphone can be useful for capturing these tiny details clearly. Mid-spring through late summer is prime time for this.
Evening shadows: Late afternoon, about two hours before sunset. The sun is low enough that vine rows cast long shadows across the soil. A high angle shows the pattern best. Walk up a hillside or terrace and shoot downward.
Harvest activities: If you’re staying during vendemmia (late August through October in most regions), find the workers in the rows. Ask permission first. A medium shot capturing a worker bending over a basket at a slightly low angle is more interesting than a flat overhead view.
Cloudy days are underrated. The diffused light removes harsh shadows, making it easier to capture even exposure across wide shots. Don’t skip rainy or overcast mornings—they can be the most productive for shooting.
Gear Recommendations for Different Farm Stay Scenarios
You don’t need a kit worth thousands of euros, but the right gear makes specific angles easier. Here’s what works well for different scenarios.
Smartphone accessories:
- Flexible tripod (Gorillapod-style): Wraps around a fence post or tree for low- or high-angle stabilization. Essential for low shots without lying down.
- Clip-on macro lens: For close-ups of grape clusters and leaf texture. Cheap and effective for phone cameras.
- Circular polarizer (clip-on for phone or screw-on for camera): Reduces glare on leaves and controls reflections on water droplets. Keeps colors saturated without editing.
Entry-level mirrorless or DSLR:
- 24-70mm zoom lens: Covers wide to medium range for most vineyard compositions.
- 50mm or 55mm lens: Great for isolating details and producing soft background blur.
- Waterproof pouch or case: Dewy mornings mean wet gear. A waterproof camera rain cover offers simple peace of mind for damp vineyard mornings.
If you’re photographing in low light or moving subjects (like workers), a fast lens with f/2.8 or wider aperture helps. If you’re mostly shooting static landscapes, a standard kit lens at f/6.3 or f/8 is sharp enough and allows more depth of field.
Ready to capture perfect vineyard shots? Book a farm stay that offers excellent photography conditions—elevation, accessibility, and stunning views. Check rates for farm stays with vineyard views.

Best Farm Stays for Vineyard Photography: What to Look For
Not every farm stay is created equal for photography. The ones that yield the best images share certain traits. When choosing a stay, prioritize these criteria.
- Elevation: Properties built on a slope or hill provide natural high-angle viewpoints. Flat land is harder to photograph without a drone.
- Vineyard accessibility: You want to be able to walk the rows. Some agriturismos keep vines as decoration; others allow guests to explore freely.
- Open terraces: A terrace overlooking the valley gives you both high and low angle options within a few steps.
- Sunrise/sunset orientation: Check whether the vineyard faces east or west. If the main view faces south, you’ll get flat overhead light at noon.
- Permission to photograph: Most places are fine with this, but a quick ask at check-in avoids misunderstanding.
Historically, agriturismos in Tuscany and Piemonte are positioned on hillsides with centuries-old vine rows. These regions consistently offer the best photo-worthy layouts. But you can find great vineyards in Puglia, Veneto, or even coastal Sicily. The key is elevation and accessibility.
Find the perfect base for your photography trip. Browse farm stays with standout vineyard locations. Book your next farm stay here.
Final Checklist: Quick Pre-Shoot Routine for Vineyard Angles
Before you head out each day, run through this quick routine. It takes two minutes and saves you from arriving at golden hour without a plan.
- Check weather and sun position: Know when the sun rises and sets. Look for cloud cover.
- Scout angles early: Walk the property during check-in or just before sunrise. Note three or four good spots.
- Set up gear for low/high shots: Attach a gorillapod or bring your tripod to at least two locations.
- Look for leading lines: Each morning, identify one natural line—a row, a path, a fence—to use as your lead-in.
- Adjust exposure for bright vines: In sunny conditions, underexpose by half a stop to preserve detail in the leaves. You can adjust in edit.
That’s it. You’re ready to go out and capture vineyard vistas that look intentional and worth sharing. The best farm stay photos come from preparation, not luck. Book your farm stay now and start planning your perfect shoot.
My honest take: don’t let perfect be the enemy of good. Pick something and start.